 Click For All The Non-Toxic 4th Of July Sales (In One Place!)
SKL is reader supported. When you buy through links on our site, we may earn affiliate commission. Learn more here.
Transform your home with over 20 DIY of my tried and true non-toxic cleaning recipes! Using simple yet powerful ingredients like vinegar, lemons, olive oil, baking soda & castile soap.

When I first started my natural cleaning journey, I had no idea how much joy and satisfaction I would find in this simple, mindful practice of making my own cleaning products at home.
As someone who has always valued sustainability and healthy living, ditching toxic conventional cleaners in favor of homemade recipes using simple ingredients like vinegar, baking soda, and essential oils just made sense.
But what I didn’t expect was how much this small shift would transform my daily life. It’s become a little ritual that grounds me and infuses my home with love and positive intention.
And the best part? These DIY cleaning products work just as well (if not better!) than their store-bought counterparts without all of the toxic chemicals.
In this article, I’m so excited to share my tried-and-true recipes for every area of your home, from tackling tough kitchen messes to keeping your bathroom sparkling clean.
Not only will you save money and reduce waste by making your own cleaners, but you’ll also be amazed at how easy it is to whip up these recipes using just a handful of affordable, non-toxic ingredients. No more mysterious chemicals or overpowering fake fragrances!
As I’ve grown more confident in my natural cleaning practice, I’ve found so much fulfillment in sharing my knowledge and recipes with others.
Whether it’s through casual conversations or blog posts like this one, empowering others to take control of their cleaning routines and create healthier homes just feels right.
By making these small, conscious choices in our daily lives, I truly believe we can create a ripple effect of positive change and work towards a more sustainable, toxin-free world for all.
So let’s roll up our sleeves, get mixing, and embrace a simpler, more mindful way of living – one non-toxic cleaning recipe at a time!
Why switch to non-toxic cleaning products?
The 10 Most Toxic Chemicals In Household Cleaning Products
- Formaldehyde: This known carcinogen is often a byproduct of chemical preservatives used in cleaning products. Long-term exposure can lead to respiratory issues, skin irritation, and even cancer. Found In: Air Fresheners, Fabric Softeners, Laundry Detergents.
- 1,4-Dioxane: Another byproduct of the manufacturing process, 1,4-Dioxane is a potential carcinogen that can be present in trace amounts due to the use of ethoxylated ingredients. Found In: Laundry Detergents, Hand Soaps, Liquid Dish Soaps, Bathroom Cleaners, and Tub/Tile Cleaners.
- Hydrochloric Acid: This highly corrosive acid is intentionally added to products like toilet bowl cleaners for its ability to dissolve rust, scale, and soap scum. However, it can cause severe burns upon contact and cause severe respiratory inflammation. Found In: Toilet Bowl Cleaners, Tub/Tile Cleaners, and Porcelain Cleaners.
- Chlorine Bleach: While an effective disinfectant, chlorine bleach can irritate the skin and eyes, and release toxic chlorine gas when mixed with other chemicals. It can also cause oxidative damage to DNA. Found In: Bleach, Laundry Products, Toilet Bowl Cleaners, and Surface Disinfectants.
- Ammonia: This harsh chemical is used in glass cleaners and oven cleaners for its grease-cutting abilities. Exposure to ammonia can lead to pulmonary edema, severe respiratory tract burns, chronic lung diseases, and corneal burns. Found In: Mirror/Glass Cleaner, Oven Cleaner, Toilet Bowl Cleaners, and Disinfectant Sprays.
- 2-Butoxyethanol: An inexpensive solvent that easily removes grease and grime from various surfaces. Chronic exposure is associated with liver and kidney damage, destruction of red blood cells, and liver cancer. Found In: Window Cleaners, All-Purpose Liquid Cleaners, Carpet Cleaners, Stain Removers, and Degreasers.
- Triclosan: Once widely used as an antibacterial agent, triclosan can still be found in some disinfectant sprays and wipes, despite FDA bans on certain products. Found in: Disinfectant Sprays, Disinfectant Wipes, Laundry Detergents.
- Nonylphenol Ethoxylates (NPEs): These cheap and effective surfactants help cleaning products spread evenly and emulsify ingredients. However, NPEs are known endocrine disruptors that can harm aquatic life. Found In: Laundry Detergents, All-Purpose Cleaning Sprays, Toilet Bowl Cleaners, and Air Fresheners.
- Quaternary Ammonium Compounds (Quats): Quats are potent disinfectants that can cause skin rashes, respiratory problems, and fertility issues. Overuse may contribute to antibacterial-resistant bacteria. Found In: Disinfectant Sprays, Antibacterial Wipes, and Toilet Bowl Cleaners.
- Phthalates: These binding agents and fragrance carriers are known endocrine disruptors linked to reproductive issues, birth defects, and respiratory problems. They may not be listed on labels, hiding under “fragrance” or “parfum.” Found In: Air Fresheners, Dish Soaps, and Laundry Detergents.
Why I Love Making My Own Non-Toxic Cleaning Recipes
Avoiding Toxic Chemicals
One of the main reasons I love DIY-ing my cleaning products is the control it gives me over what ingredients I use. When I make my own cleaners, I know exactly what’s going into each bottle.
I can pick and choose natural, non-toxic ingredients that I know are safe for me and my family. No more worrying about hidden toxins or trying to decipher complicated ingredient lists.
Customizing Products to Suit My Needs
Another great aspect of making my own cleaning products is that I can completely customize them to my specific needs and preferences. I can tailor the scent, strength, and consistency depending on what I need to clean.
If I need a more heavy-duty solution for a particularly tough cleaning job, I can boost the power of my homemade cleaners with simple tweaks. Or I can dial them down for everyday tasks like wiping counters.
Saving Money in the Long Run
Apart from keeping myself and my family safe and healthy, making your own natural cleaning products at home can save you a lot of money in the long run.
Many of the core ingredients, like baking soda, vinegar, and castile soap, are really affordable and can be used in multiple recipes. Plus, I’m not paying for the markup on fancy packaging or marketing gimmicks. Over time, the savings really add up!
Reducing Waste and Minimizing Environmental Impact
As someone who also cares deeply about the environment, I love how making my own cleaning products helps me reduce waste and minimize my environmental footprint.
By using reusable containers and buying ingredients in bulk, I can significantly cut down on single-use plastic packaging. Plus, the natural ingredients I use are biodegradable and much gentler on the planet compared to harsh, synthetic chemicals.
Everything You Need To Get Started
Get ready to clean out that stash of cluttered cleaning products sitting under your kitchen sink. You’ll be amazed at how many cleaning solutions you can make from just a handful of affordable ingredients. No more toxic chemicals, and a whole lot more space!
The Staples
- Distilled Water: Using distilled water in homemade cleaners helps to prevent mineral buildup and ensures consistent results. It acts as a neutral base for DIY cleaning solutions and since it has been distilled it will help make your homemade cleaning solutions last longer.
- White Distilled Vinegar: Made from grain alcohol and contains about 5% acetic acid, which gives it its cleaning power. Acetic acid is a weak acid that can dissolve mineral deposits, cut through grease, and kill certain bacteria and viruses. It dissolves soap scum, removes hard water stains, and eliminates odors.
- Non-Toxic Liquid Dish Soap: Non-toxic dish soap contains natural surfactants that help to break down grease and dirt, making it easier to wash away. It helps to cut through grease and leaves surfaces clean and shiny without toxic chemicals.
- Castile Soap: A vegetable-based soap made from olive oil, coconut oil, or other plant oils. Castile soap is a surfactant, meaning it helps water mix with oils and dirt, making it easier to wash them away. It cuts through grease, removes dirt and grime, and leaves surfaces clean without harsh chemicals.
- Baking Soda: A naturally occurring substance often used in baking and cleaning. Baking soda is a mild alkali that can neutralize acids, absorb odors, and act as a gentle abrasive. It deodorizes, removes stains, and scrubs away dirt and grime.
- Hydrogen Peroxide: A clear liquid compound made up of hydrogen and oxygen (H2O2). Hydrogen peroxide is an oxidizing agent that breaks down into water and oxygen, which helps to lift stains and kill bacteria. Disinfects whitens, and removes stains. Always use 3% solution stored in a dark bottle and test on an inconspicuous area before use.
- Rubbing Alcohol: A clear, colorless liquid often used as a disinfectant. Rubbing alcohol is a solvent that can dissolve oils and kill bacteria, viruses, and fungi. Disinfects remove grease and grime and evaporate quickly without leaving streaks. If you prefer something completely natural you can use inexpensive, high-proof vodka.
Natural Boosters
- Washing Soda: A highly alkaline substance used in cleaning and laundering. Washing soda breaks down grease and oils, softens water, and helps remove stubborn stains. Powerful cleaner and degreaser, especially effective on heavy-duty messes. It can be irritating to the skin and eyes. Wear gloves when handling and avoid inhaling the powder.
- Borax: A naturally occurring mineral often used in cleaning and laundry. Borax is alkaline and helps to break down dirt, grease, and stains. Whitens deodorizes, and boosts cleaning power. It can be harmful if ingested – keep away from children and pets.
- Table Salt: Salt acts as a mild abrasive and can help dislodge dirt and grime. Scrubs away stubborn stains and messes deodorizes, and brightens colors. Generally safe, but can scratch delicate surfaces. Common applications include scouring pots and pans, removing rust, and brightening laundry.
- Olive Oil: Olive oil’s moisturizing properties help to condition and protect wood surfaces. Nourishes and polishes wood, leather, and metal. It is also great for lifting dust from flat surfaces. No need to spend the big bucks on EVOO, low-cost olive oil will do.
Natural Fragrances
- Lemon Juice: The tart, acidic liquid extracted from fresh lemons. Citric acid in lemon juice acts as a natural bleaching agent and disinfectant. Removes stains, cuts through grease, and leaves a fresh citrus scent. You can squeeze your own at home, or buy the premade stuff.
- Citrus Peels: The outer skin of citrus fruits like lemons, oranges, and limes. Citrus peels contain natural oils that have cleaning and deodorizing properties. I love to use leftover citrus peels to infuse vinegar with a fresh scent that also helps to cut through grease and grime.
- Essential Oils: Avoid synthetic fragrances by using essential oils. Many essential oils have antibacterial, antifungal, and antiviral properties that can enhance the effectiveness of homemade cleaners.
**As a note, only include essential oils in solutions that include alcohol, a carrier oil, or castile soap.
**Essential oils don’t mix with water or vinegar (this is why carrier oils are important). EOs will sit on top of your spray and that is pointless.
**Also, be careful when using essential oils. Even though they are natural, it doesn’t mean they don’t come without risks.
**Be sure to do a patch test to rule out any allergies or reactions before using your cleaning products, especially if you will be using them around children or pets.
Essential Supplies
- Spray Bottles: Here at SKL we recommend glass whenever possible since it is non-reactive and won’t leach BPA, phthalates, or other toxins into your cleaning products. Be sure to get a few amber bottles to extend the life of your cleaning products that contain hydrogen peroxide. You can also opt for aluminum or BPA-free plastic spray bottles for mixing and storing your cleaning solutions.
- Glass Jars or Mason Jars: Ideal for infusing vinegar with herbs and citrus peels, larger jars with wide mouths make it easier to add ingredients.
- Storage Containers: Airtight containers in various sizes are helpful to store your bulk ingredients and keep them fresh.
- Measuring Cups and Spoons: These are for accurate measurements of your ingredients when preparing cleaning solutions.
- Mixing Bowls: Useful for combining ingredients before transferring them to spray bottles or jars.
- Funnel: Helps pour liquids into bottles without spills, especially when using smaller openings.
- Mesh Strainer: Good for straining infused vinegar or other mixtures to remove solid ingredients.
- Labels: To mark your bottles and jars, ensuring you know what each mixture contains and its intended use.
- Grater: Useful for grating castile soap to make it easier to dissolve in liquid solutions.
DIY Non-Toxic Cleaning Recipes For The Kitchen
1. Disinfecting Surface Spray
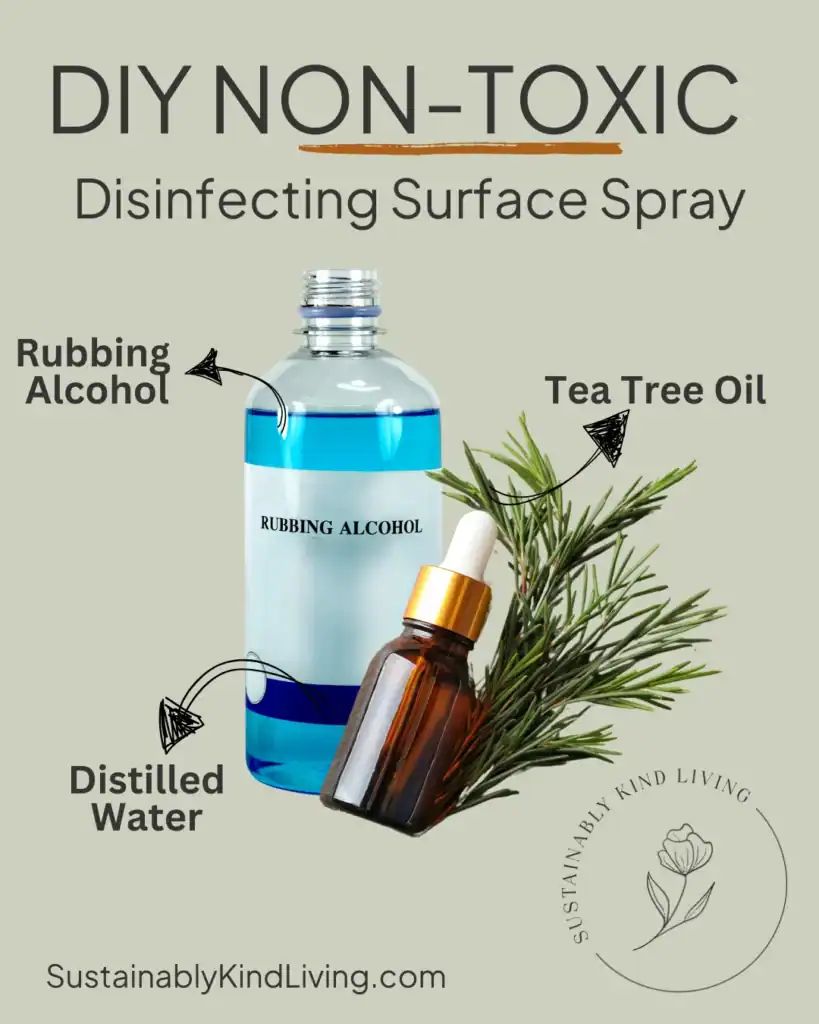
This recipe is great for any room in your home, including bathrooms, but I find I use it most in my kitchen on my counters and sinks to help prevent cross-contamination after cutting raw meat.
It’s also a lifesaver during cold and flu season for spraying light switches, door handles, and any other high-touch areas that can easily spread unwanted germs.
Ingredients:
- 1 part rubbing alcohol or high-proof vodka
- 1 part distilled water
- 10 drops of tea tree oil (optional)
Instructions:
- Using a funnel, pour equal parts rubbing alcohol and distilled water into a 16 oz glass spray bottle.
- Add 10 drops of tea tree oil, if desired. The spray will still be an effective disinfectant without the tea tree oil.
To Use:
- Spray on the desired surface and let sit for at least 30 seconds (longer is better).
- Wipe clean with a dry towel.
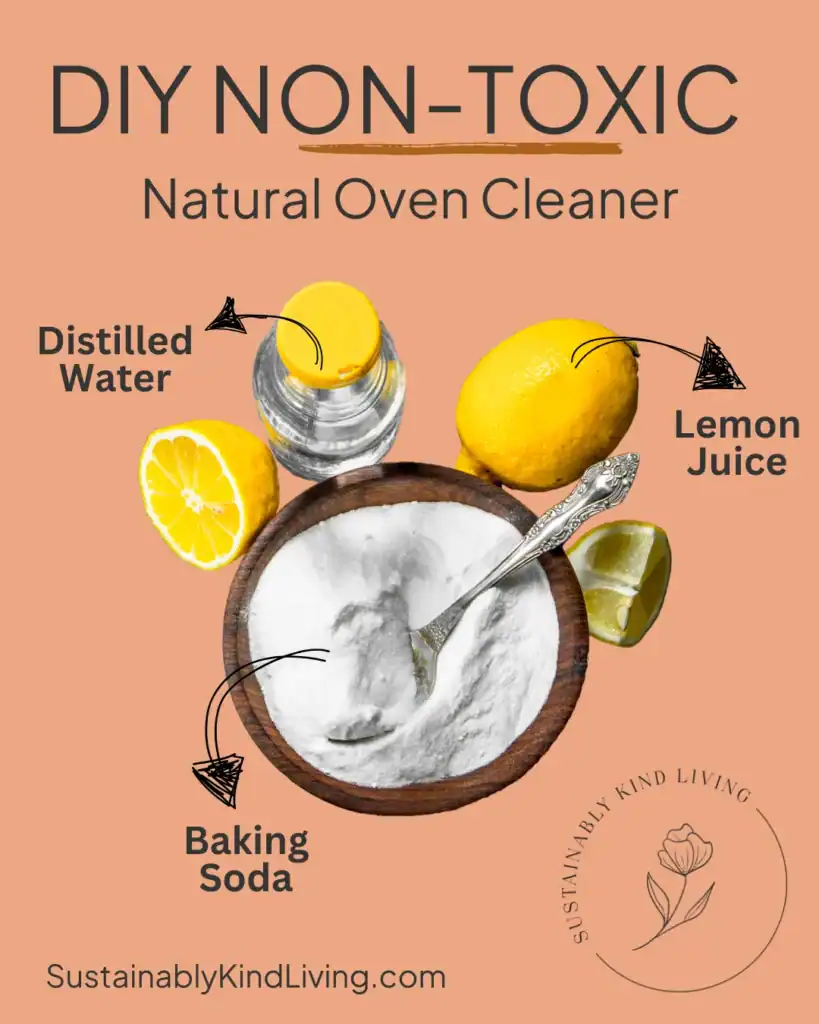
Oven cleaner is one of the most toxic chemicals found in the home. Many commercial oven cleaners contain sodium hydroxide (lye), a highly corrosive substance that can cause severe skin and eye burns, respiratory irritation, and even disrupt endocrine function.
Some of these products may also contain chemicals linked to cancer, posing long-term health risks to users.
While cleaning the oven can be a greasy, grimy job requiring a little elbow grease, it’s worth steering clear of all those awful chemicals in store-bought oven cleaners.
Plus, the more often you clean your oven with this all-natural recipe, the easier it will get. And because it smells so nice, you’ll be inclined to clean your oven more often.
Ingredients:
- 1 cup distilled water
- 2 cups baking soda
- 2 cups lemon juice
Instructions:
- Combine all ingredients in a glass jar. The mixture should have the consistency of a liquid paste that will stick to the sides of your oven without running down.
- Start with less water/lemon juice and increase as needed to reach the desired consistency.
To Use:
- Remove everything from your oven, including the racks. (You can apply this paste to your racks separately and leave them in the bathtub/shower to set.)
- Apply the paste with a silicone brush to all interior walls of your oven, avoiding the heating elements.
- Let the paste sit for at least 30 minutes (the longer, the better).
- Using a damp towel, wipe out the remaining baking soda mixture.
- Replace the oven racks.
3. Stove Top Cleaner

I always have this spray ready at hand after a long day of meal prep. This quick and easy spray is perfect for cleaning up splattered oil on your stovetop and even the inside of your microwave.
Just be sure to go easy on the soap, since using too much can leave streaks. If you have a stainless steel or glass range, I like to use a little rubbing alcohol on a towel to wipe away any remaining streaks for a perfect, streak-free shine.
Ingredients:
- 2 cups distilled water
- 1 ½ teaspoons non-toxic liquid dish soap or liquid castile soap
Instructions:
- Using a funnel, pour 2 cups of distilled water into a spray bottle. Add the water first to avoid creating too many suds.
- Add a scant 1 ½ teaspoons of liquid dish soap or castile soap. Adjust the amount as needed after using the spray a few times.
- Shake well to combine.
To Use:
- For a lightly soiled, greasy stovetop, spray directly on the surface and wipe with a damp towel.
- For baked-on grease, sprinkle baking soda or cream of tartar after spraying, and use a sponge to break up the grease and grime before wiping away with a damp cloth.
- For stainless steel or glass ranges, use a little rubbing alcohol on a towel to remove any remaining streaks and achieve a perfect, streak-free shine.
4. Dish Soap
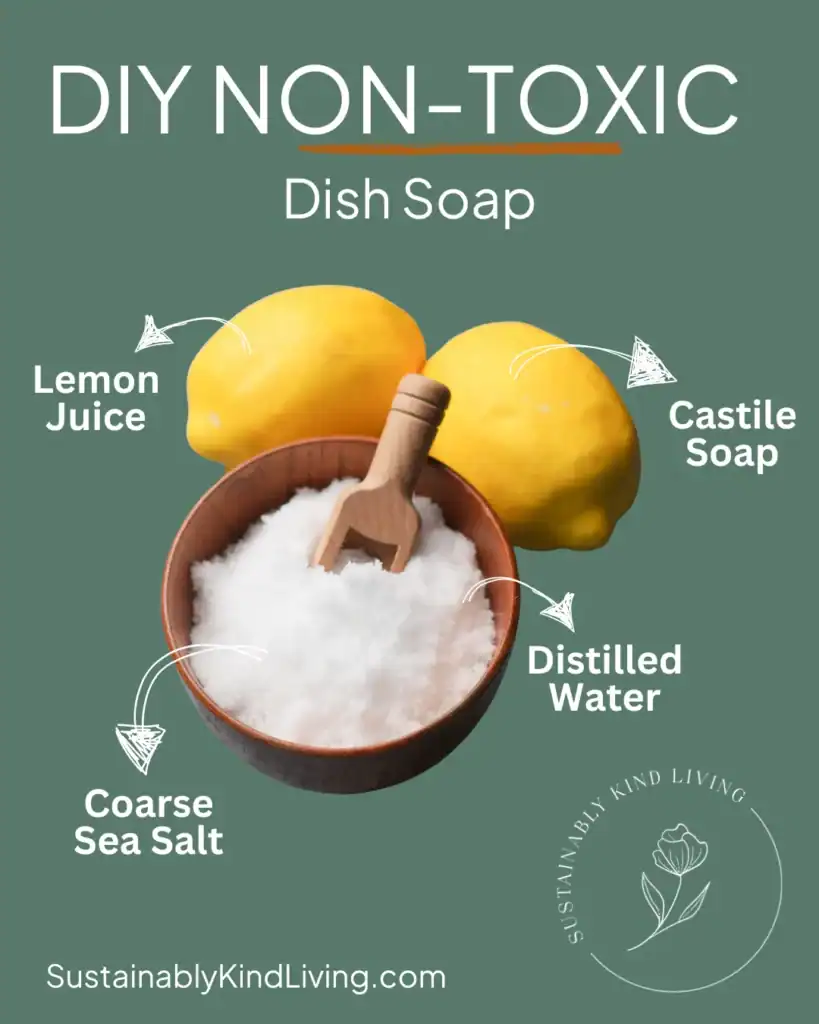
As much as I love the convenience of store-bought dish soap, I don’t love all the toxic chemicals and artificial fragrances that come with it.
When you find out how easy (and cheap!) it is to make your own natural dish soap, you’ll never want to go back. Plus, you can customize the scent with your favorite essential oils or stick to the classic lemon scent from the recipe.
Just remember, this homemade version won’t create as many suds as commercial dish soaps, but that doesn’t mean your dishes aren’t getting clean!
Ingredients:
- 1 cup boiled distilled water
- ½ tablespoon coarse sea salt
- 2 tablespoons lemon juice
- ½ cup liquid castile soap
Instructions:
- In a glass jar, add coarse sea salt to boiling water and mix until dissolved.
- Add lemon juice to the saltwater mixture.
- Slowly pour in liquid castile soap while stirring to combine.
- Let the mixture cool. It will thicken as it cools.
To Use:
- Apply the homemade dish soap to a sponge or scrub brush as you would with store-bought dish soap.
- Rinse your dishes thoroughly with warm water, as castile soap contains oils that may leave a residue if not rinsed well.
5. Dishwasher Tablets

I love the convenience of dishwasher tablets – just toss them in and forget about them. What I don’t love are all the toxic fragrances, phosphates, and microplastics that come with standard dishwasher tablets.
When you find out how easy (and cheap!) these are to make, you’re never going to want to go back to store-bought again.
Plus, you can feel good knowing you’re not exposing your family to harmful chemicals every time you run the dishwasher.
Ingredients:
- 1 cup baking soda
- ¼ cup citric acid
- 1 tablespoon non-toxic liquid dish soap
Materials:
- Whisk
- Silicone ice tray
Instructions:
- Mix the baking soda, citric acid, and dish soap together with a whisk until the mixture resembles wet sand.
- Pack the mixture into a silicone ice tray, pressing it down firmly.
- Let the mixture rise for 10 minutes, then scrape off the excess and set it aside for later use.
- Allow the tablets to dry completely before removing them from the ice tray.
- Store the tablets in an airtight jar to keep them dry.
6. Cutting Board Protectant

It seems like everywhere you turn, experts are recommending protecting and sealing your wooden cutting boards with mineral oil.
However, mineral oil is a petroleum-based product and is not intended to be consumed. And what’s on your cutting board inevitably ends up on your food.
Honestly, all you need is a little bit of coconut oil on a damp rag for routine maintenance, but once or twice a year, I like to use this board balm for extra protection. It also makes for a great stocking stuffer for any cooks in your family.
Ingredients:
- 12 grams beeswax
- 36 grams of coconut oil
Instructions:
- Create a double boiler by pouring about 2 inches of water into a medium saucepan and placing a large metal mixing bowl on top. Bring the water to a simmer, being careful not to touch the hot bowl without oven mitts.
- Melt the beeswax and coconut oil together in the metal bowl.
- Pour the mixture into a glass jar with an airtight lid.
- Let the mixture cool for 2 hours before use.
To Use:
- Wash your cutting board thoroughly with soap and water, and let it dry overnight.
- Using a damp cloth, scoop out some of the beeswax mixture and apply it all over the board, including the edges and corners.
- Allow the board to sit for 24 hours before using it for cutting.
7. Floor Cleaner (Vinyl or Tile Floors)

This non-toxic floor cleaner is great for when your kitchen floors start to feel a little sticky. It comes together quickly and easily, and since the ingredients are all-natural, you don’t have to worry about your pets or little ones picking up any nasty chemicals as they crawl across the floor.
You can easily eyeball this recipe – it doesn’t need to be exact. The key is to have equal parts of each ingredient as best as possible. If your floors are very dirty, you can halve the alcohol amount, but the alcohol does help the mixture dry quickly.
Ingredients:
- 2 cups hot water (tap is fine)
- 2 cups white distilled vinegar (a citrus or lavender-infused vinegar is great for this)
- 2 cups 70% rubbing alcohol or high-proof vodka
- 5-10 drops of essential oils (optional)
Instructions:
- Combine the hot water, distilled vinegar, and rubbing alcohol in a large mop bucket.
- If desired, add up to 10 drops of your favorite essential oil for scent. Use less to avoid leaving an oily residue that can attract dust and shoe prints.
- Infused vinegar can be used instead of essential oils for a subtle scent.
To Use:
- While the mixture is still hot, use your favorite mop to clean the floors as usual.
- Let the floor air dry naturally; no need to rinse.
DIY Non-Toxic Cleaning Recipes For The Bathroom
8. Shower/Tub Cleaner

I feel like I’m always fighting mold and mildew in my shower. I’ve tried baking soda, lemon juice, and cleaning vinegar – almost everything in my cleaning arsenal – but I never thought to try hydrogen peroxide.
Turns out, hydrogen peroxide is great for more than just cuts and scrapes; it does an incredible job fighting mold.
Important: If you use this tip, please do not mix hydrogen peroxide with any other ingredients, especially vinegar, because it can create peracetic acid, which can be irritating to your eyes and respiratory tract.
Ingredients:
Instructions:
- Add 3% hydrogen peroxide to a glass spray bottle (don’t forget to label it!).
To Use:
- Spray directly onto affected areas and let sit for 10 minutes (or longer).
- Using a toothbrush or a scrub brush, scrub away the mold.
- Rinse with water after use and let the shower/tub dry completely (keep the curtain/door open and turn on the fan).
9. Toilet Bowl Cleaner

Toilet bowl cleaners are among the most toxic household chemicals due to their high chlorine content, which can cause respiratory irritation and harm the thyroid when inhaled.
While cleaning the toilet is no one’s favorite job, it’s not nearly as dirty as you might think and doesn’t really warrant the use of such harsh chemicals.
In fact, a toilet seat has only 50 bacteria per square inch, whereas a kitchen sponge can have up to 10 million bacteria per square inch.
Ingredients:
- 1 ¾ cups distilled water
- ¼ cup castile soap
- 2 tablespoons baking soda
Instructions:
- Add water, castile soap, and baking soda to a plastic squeeze bottle and shake to combine.
To Use:
- Shake well before each use.
- Squeeze 2-3 tablespoons around the perimeter of your toilet bowl and use a toilet bowl brush to distribute and scrub as usual.
- Flush once clean.
- If you notice mold or mildew on your toilet seat, this is a great time to use your hydrogen peroxide spray and wipe it away with a paper towel. Just be sure your toilet bowl mixture is completely flushed before spraying your hydrogen peroxide.
10. Grout Cleaner

A lot of commercially made grout and tile cleaners contain chlorine bleach, so I try to avoid them at all costs. And when it’s so easy to make at home, I’d rather make it myself than make an unnecessary run to the store.
Ingredients:
- 1 cup baking soda
- ½ cup hydrogen peroxide
- 1 tablespoon non-toxic liquid dish soap or liquid castile soap
Instructions:
- In a bowl, combine baking soda, hydrogen peroxide, and liquid soap.
- The mixture should come together in a paste-like consistency, a little more liquidy than toothpaste (you want it to be able to spread easily into cracks).
To Use:
- Apply the paste along grout lines.
- Let sit for at least 30 minutes (the longer, the better), but do not let it dry.
- Scrub with a grout brush.
- Rinse away the solution using warm water.
11. Mirror & Glass Cleaner
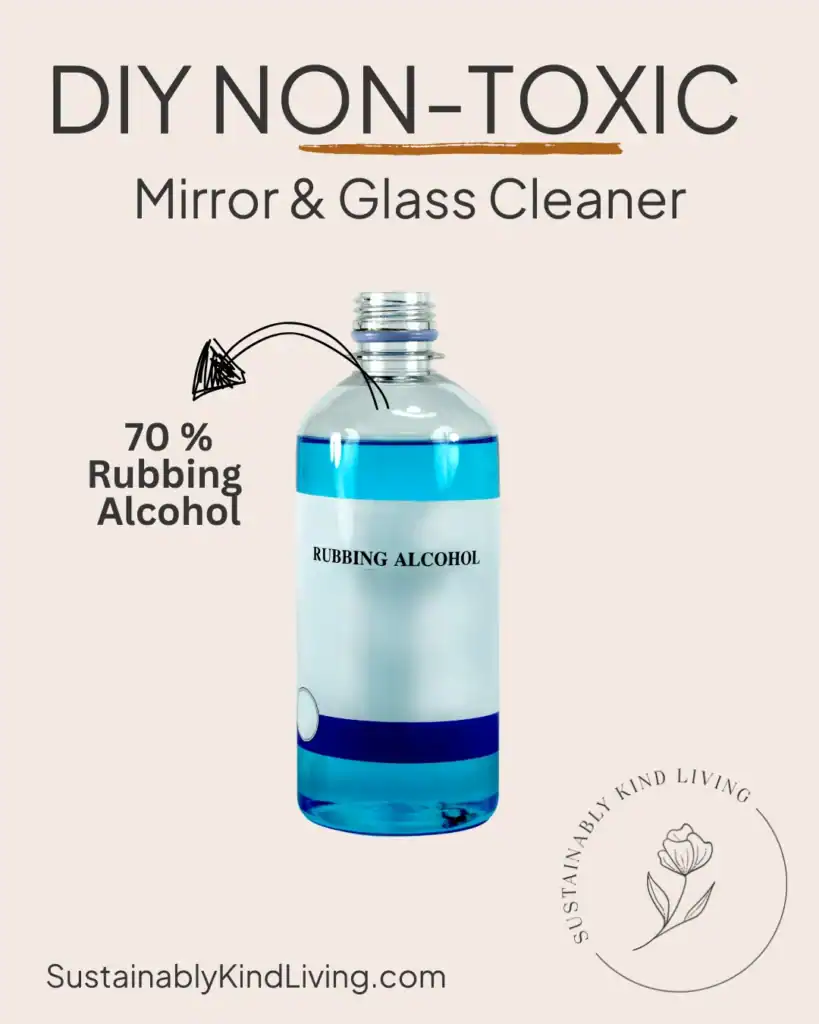
This is another tip rather than a recipe. I’ve tried a handful of DIY natural glass and mirror sprays with some combination of rubbing alcohol, liquid dish soap, and distilled vinegar. And to be honest, they all left streaks behind. It drove me crazy.
I found that straight rubbing alcohol or high-proof vodka sprayed directly onto glass and mirrors and then wiped clean with a paper towel is the best way to get my glass and mirrors completely spotless. This is also a good tip for removing fingerprints and smudges from stainless steel.
Ingredients:
- 70% rubbing alcohol or high-proof vodka
Instructions:
- Add rubbing alcohol to a small glass spray bottle.
To Use:
- Spray directly on glass, mirrors, or stainless steel.
- Wipe with a dry paper towel or microfiber cloth.
- If you find the alcohol scent to be overpowering, you can dilute the alcohol with some distilled water, but this may slow the drying time and potentially leave water spots.
12. Soap Scum Remover

When my shower or tub needs a good deep clean, I whip up this easy soap scum remover. In most cases, you can also use this on glass shower doors, but do a test patch on the bottom corner beforehand to make sure the baking soda won’t scratch your glass.
Ingredients:
- 1 cup baking soda (if your shower or bathtub is particularly grimy, you can use washing soda for some extra oomph, but be sure to wear gloves when applying!)
- 1 tablespoon non-toxic liquid dish soap or castile soap
Instructions:
- Mix the baking soda and liquid dish soap together until it forms a paste.
- The paste should not be runny, so increase the baking soda if needed so that the paste won’t run down the walls.
To Use:
- Using a microfiber cloth, apply the paste to your shower or tub.
- Let it set for 30 minutes (the longer, the better, but don’t let the baking soda dry).
- Wipe away with a damp cloth.
- In some cases, it may be necessary to scrub with a sponge before removal.
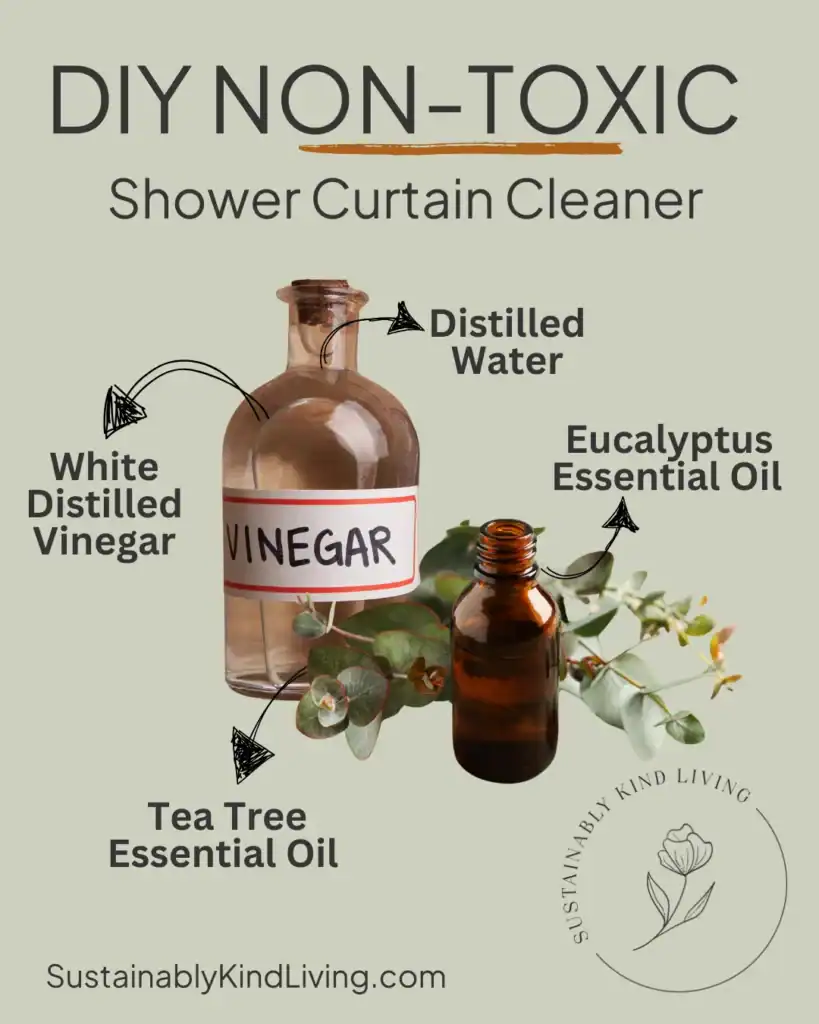
13. Shower Curtain Cleaner
Is there anything more ick-inducing than a mildewy shower curtain clinging to your back or leg as you’re trying to get clean in the shower?
The best way to really deep clean your shower curtain is to remove the lining and throw it in the washing machine on warm with some non-toxic laundry detergent and ¼ cup of cleaning vinegar. Add in an old towel to keep it from bunching.
To help keep your shower curtain cleaner longer, I like to use this shower curtain spray in between washes. Plus, it will make your shower smell like a heavenly spa!
Ingredients:
- 1 cup distilled water
- 1/4 cup white distilled vinegar
- 10 drops eucalyptus essential oil
- 5 drops of tea tree essential oil (optional, for added antimicrobial properties)
Instructions:
- In a clean glass spray bottle, combine the distilled water and white vinegar.
- Add the eucalyptus essential oil and tea tree oil (if using).
- Shake the bottle well to mix the ingredients.
To Use:
- Keep the spray bottle in your shower and spray the mixture onto your shower curtain liner after each use, focusing on areas prone to mildew and soap scum.
- Tip: Tea tree essential oil has a strong scent – start with 1 drop or eliminate altogether if you are sensitive to it.
DIY Non-Toxic Cleaning Recipes For The Laundry Room
14. Stain Remover

Forget the bleach and those expensive stain sticks! If you have a messy eater in your household, this DIY stain remover is a life (and clothing) saver! This also works to remove stains from carpets and upholstery, too.
Ingredients:
- ¼ cup non-toxic liquid dish soap
- ¼ cup hydrogen peroxide
- ½ cup baking soda
Instructions:
- In a glass jar or small bowl, mix together dish soap, hydrogen peroxide, and baking soda to form a liquidy paste.
To Use:
- Using a toothbrush, apply directly to the stain, saturate completely, and scrub to help loosen the stain. Let sit for several hours, up to a day before laundering.
- Do a patch test on any delicate fabrics first, like silk or satin. For these delicate fabrics, forgo the toothbrush and apply with your fingers.
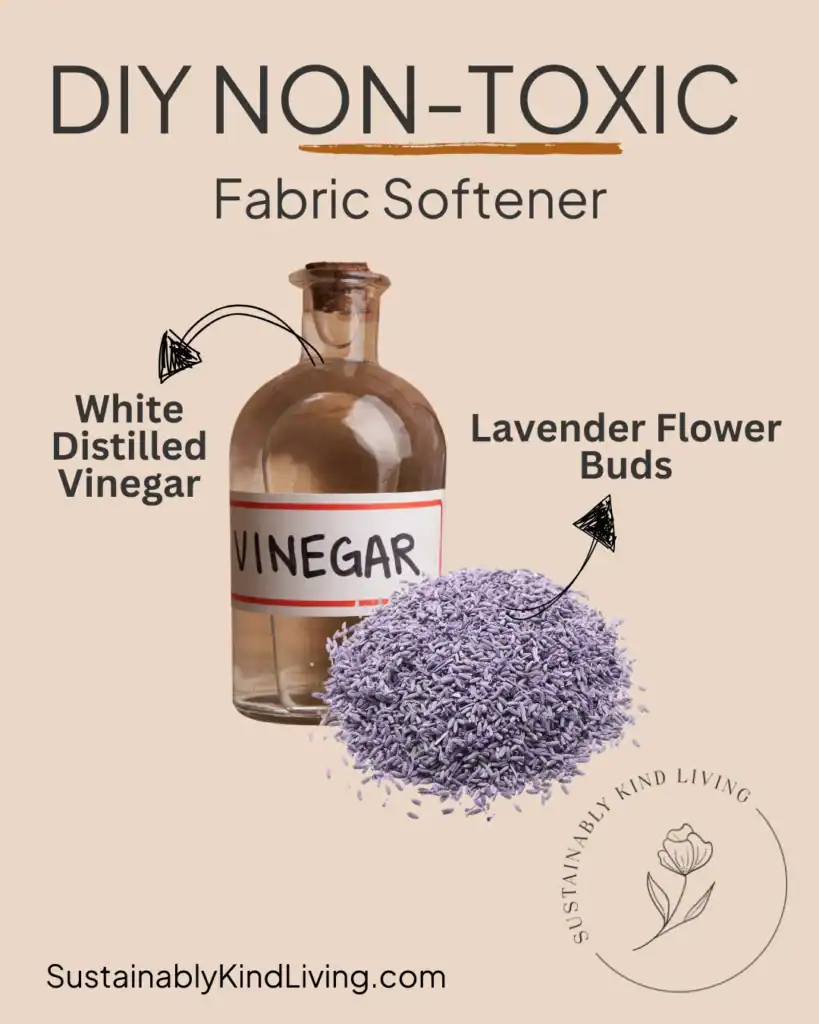
15. Fabric Softener
Fabric softener is one laundry product I ditched long ago. The scents were so overpowering, and I didn’t feel like they were really benefiting my laundry routine.
But now and again, I do notice my towels and sheets feeling a little stiff after I hang them out to dry. I like to add this super simple “fabric softener” to the rinse cycle of my laundry.
This recipe has just two ingredients and could even be one ingredient if you want to go for an unscented version.
Vinegar is the secret ingredient. The acid helps to soften fibers and remove any residue buildup from your laundry detergent.
Ingredients:
- Distilled white vinegar
- Dried lavender flower buds (lemon peels also smell great!)
Instructions:
- Add distilled white vinegar to a mason jar (I usually make 2 cups at a time).
- Add 2-3 tablespoons of dried lavender buds to the vinegar.
- Stir to dampen the flower buds and let them infuse for a week before use.
To Use:
- Be sure to strain all lavender buds from your fabric softener before use so they don’t get stuck in your washing machine!
- Add about ⅛ cup to your washing machine’s rinse cycle.
- Even though it’s lavender in color, it won’t stain your clothes.
16. Laundry Detergent
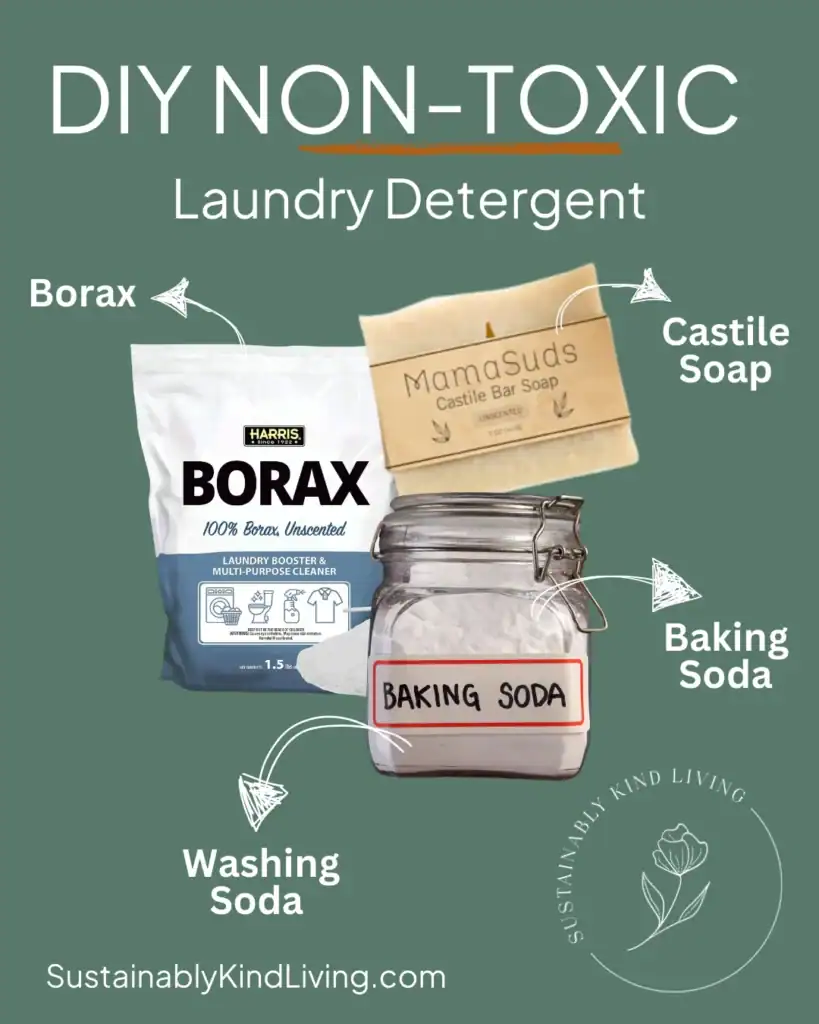
This simple powder detergent is perfect if you need a low-suds formula that’s easy to store and transport.
Ingredients:
- 1 cup borax
- 1 cup washing soda
- 1 cup baking soda
- 1 bar (4-5 oz) castile soap, finely grated
Instructions:
- In a large bowl, combine the borax, washing soda, and baking soda. Mix well.
- Using a cheese grater or food processor, finely grate the castile soap. Add it to the bowl with the other ingredients.
- Stir the mixture until the grated soap is evenly distributed.
- Transfer the detergent to an airtight container for storage.
To Use:
- Use 2 tablespoons per load (add directly to the drum in HE machines).
- Store in a cool, dry place out of direct sunlight. Check for signs of mold and discard if the smell or color appears off.
17. Washing Machine Rinse

Maybe you forgot a wet load of laundry in your washing machine for a day (or three), and it’s starting to stink. (I’ve been guilty of this more times than I would like to admit!)
Or maybe it’s been a while, and you notice all of your clothes coming out of your washing machine just smell musty, no matter what you do. It’s time to rinse out that washing machine drum!
Ingredients:
- ¾ cup white distilled vinegar
- 10 drops of tea tree essential oil
- 5 drops of grapefruit essential oil
Instructions:
- Combine vinegar and essential oils in a glass spray bottle and shake to combine.
To Use:
- Shake immediately before use.
- Liberally spray the interior of your washing machine drum, including the door, rubber gasket, and dispenser.
- Take a clean cloth and wipe it down.
- Run a rinse cycle on hot before adding clothing.
18. Laundry Brightener

It’s unavoidable – those white towels, sheets, and t-shirts all seem to get yellow and dingy, no matter what you do. If that’s the case, try out this homemade laundry brightener bleach alternative.
It may take several loads to start seeing a major difference, but it’s a great alternative to chlorine bleach, and you don’t have to worry about bleach spots getting on your other clothing.
Ingredients:
- 1 cup of distilled water
- ½ cup baking soda
- 1 cup of hydrogen peroxide
Instructions:
- Mix the distilled water, baking soda, and hydrogen peroxide in a glass jar.
- Seal and shake to combine.
To Use:
- Fill a bucket or your bathtub with hot water.
- Add your clothes/sheets/towels to the hot water.
- Apply your homemade brightening solution. If you have any baking soda left over in the bottom, you can add a little water to make sure all of the solution ends up on the clothing.
- Let sit for 1-3 hours before laundering.
- Launder as normal with your favorite non-toxic laundry detergent.
DIY Non-Toxic Cleaning Recipes For The Bedroom
19. Room Freshener
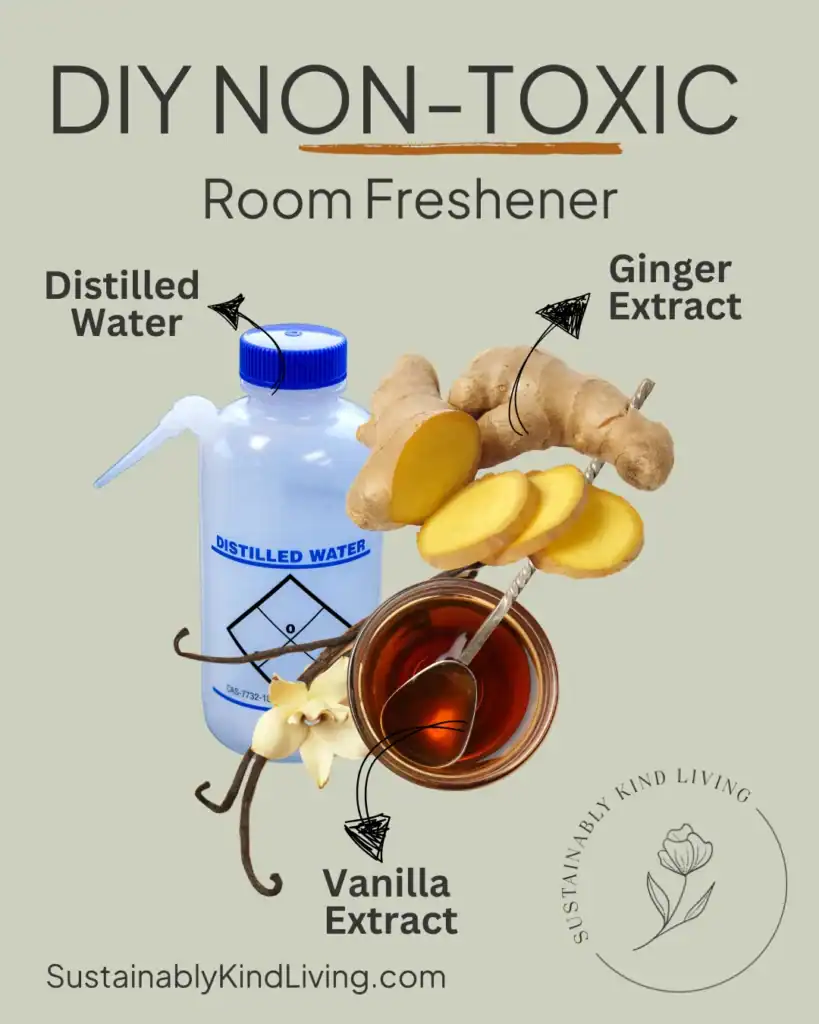
Most air fresheners are made with seriously toxic chemicals like formaldehyde and benzene so they’re actually doing more harm than good when you’re spraying them around your home.
Why not try this completely natural version instead, which I think actually smells way better than those synthetic fragrances in most air freshener room sprays?
Ingredients:
- 4 tablespoons distilled water
- 3 ½ tablespoons vanilla extract
- ½ tablespoon ginger extract
Instructions:
- Combine distilled water, vanilla extract, and ginger extract in a small bowl or glass measuring cup.
- Transfer to a small glass spray bottle.
To Use:
- Spray liberally around your room as needed to freshen.
- Avoid spraying directly on bedding or linens as vanilla extract may stain.
20. Linen Spray

Sometimes there are items in your bedroom that you just can’t wash. Like those fancy throw pillows. And sometimes you just want a quick refresh between wash days.
That’s when I like to use this upholstery-friendly linen spray. If you want to make a larger batch just be sure to keep a 1:1 ratio of distilled water to witch hazel.
Ingredients:
- 100 ml of distilled water
- 100 ml of witch hazel
- 25 – 50 ml of rubbing alcohol
- Add 40 drops of eucalyptus oil (or your favorite essential oil)
Instructions:
- Combine the distilled water, witch hazel, and rubbing alcohol in a reusable glass spray bottle.
- Once combined add in your eucalyptus oil or essential oil of choice.
To Use:
- Gently mist over linens and pillows- do not spray directly to avoid over-saturation.
21. Wrinkle Release

Nothing beats a crisply made bed, and nothing ruins a freshly made bed like wrinkles!
Use this wrinkle-release spray on your sheets between washings or even in your closet when you don’t have time to iron. It’s also great to take with you on vacation to unwrinkle clothes straight from your suitcase.
Ingredients:
- 1 teaspoon of your favorite non-toxic hair conditioner
- 1 teaspoon of white vinegar
- 100 ml of distilled water
Instructions:
- Combine the hair conditioner, white vinegar, and distilled water in a small spray bottle.
- Shake to combine.
To Use:
- Lightly mist your sheets or clothes- do not spray directly to avoid over-saturation.
- Once lightly moistened run your hand over the sheets or clothes to smooth out wrinkles.
- Let dry completely.
DIY Non-Toxic Cleaning Recipes For The Living Room
22. Dusting Spray
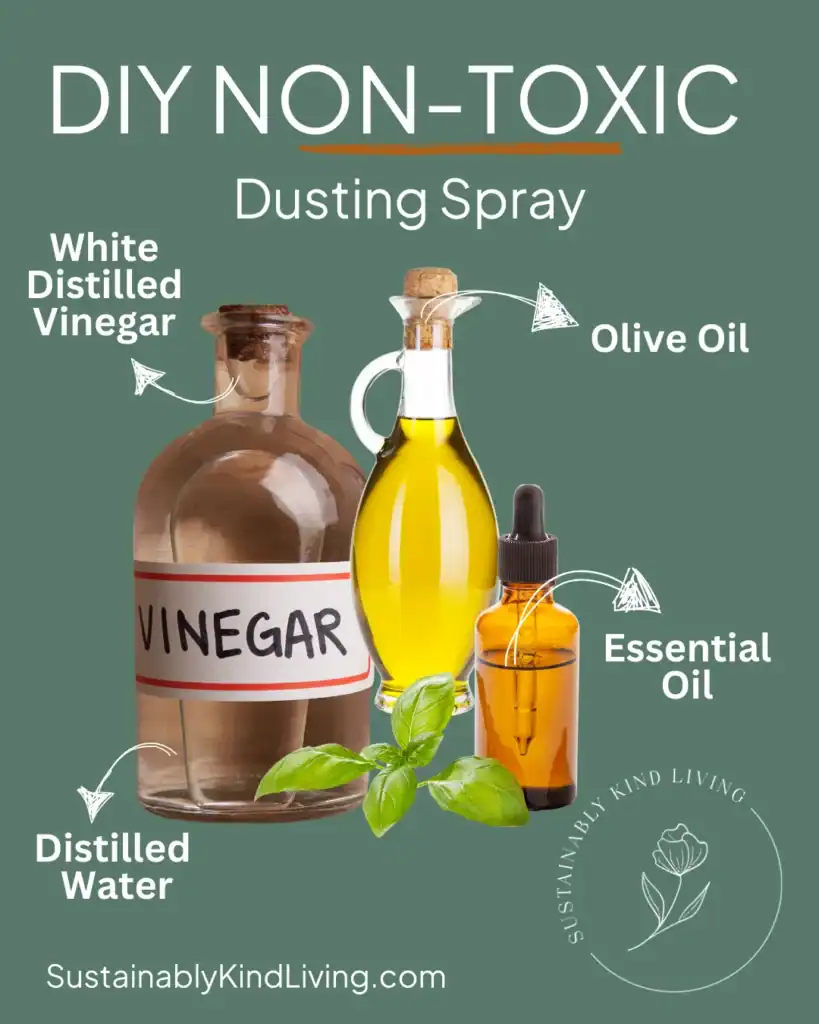
While dust might seem harmless, it can actually harbor a variety of toxic chemicals and allergens like flame retardants, phthalates, and heavy metals.
This is why you want to use a spray to dampen surfaces before you dust, so the particles aren’t just released back into the air.
Ingredients:
- 1 cup of distilled water
- ¼ cup of distilled white vinegar
- 2 teaspoons of olive oil
- 15 drops of your favorite essential oil (optional)
Instructions:
- Combine distilled water, white vinegar, olive oil, and essential oils in a reusable glass spray bottle.
- Shake to combine.
To Use:
- Shake before each use – the olive oil is necessary to help catch dust particles.
- Spray lightly onto the surface to be dusted.
- Wipe with a clean microfiber cloth.
- For glass surfaces or stainless steel surfaces, follow with rubbing alcohol to remove any streaks.
23. Carpet Shampoo

Living rooms and dining rooms tend to be those rooms with the most unexpected spills – hot chocolate, red wine, black tea.
But no need to stress! And no need to bring out those super toxic carpet cleaners filled with perchloroethylene and volatile organic compounds (VOCs). This fix lifts stains quickly and easily.
Ingredients:
- Borax
- Distilled water
Instructions:
- Blot spill to get up as much excess liquid as possible.
- Sprinkle borax over the stain.
- Use a scrub brush to scrub the stain until it is removed.
- If needed, spray with additional distilled water to help loosen the stain.
Tips:
- Wear gloves when applying borax and scrubbing.
- Be sure to rinse borax thoroughly out of the carpet, as any leftover residue could affect the color of the carpet and attract additional dirt over time.
- If you have a carpet shampooer, vacuum over the spot with water only to help completely remove any residue.
24. Couch Deodorizer

Couches, especially older ones, tend to grab onto environmental smells and hold on to them – especially if you have pets or kids. Wouldn’t it be great if you could just toss the whole thing in the washing machine?
Since we can’t do that, this couch deodorizer is the next best thing! While it might sound counterintuitive to spray alcohol on your couch to remove odors, it works like a charm!
The vodka kills any bacteria and deodorizes any foul smells without damaging the fabric. It’s also great for smelly shoes!
Ingredients:
- 200 ml distilled water
- 200 ml high-proof vodka
Instructions:
- Combine distilled water and vodka in a reusable glass spray bottle.
To Use:
- Gently mist across couch pillows and cover.
- In this case, vodka tends to work better than rubbing alcohol to remove odors long-term.
25. Furniture Polish

I love using this recipe for the heirloom wood furniture I’ve received as hand-me-downs over the years. It’s just the right combination for removing dust and bringing back luster without any harsh chemicals that can wear down the finish over time.
For this recipe, I recommend just making as much as you will need as this doesn’t tend to store well long-term. You can also use this to remove fingerprints from stainless steel.
Ingredients:
- 1 tablespoon of olive oil
- ½ tablespoon of distilled white vinegar (this is a great opportunity to use your citrus-infused vinegar)
- ½ tablespoon lemon juice
- 5-10 drops of lemon essential oil (optional)
Instructions:
- In a small glass jar combine oil oil, distilled vinegar, lemon juice, and lemon essential oil (if desired).
- Shake well to combine.
To Use:
- Apply a small amount to a microfiber cloth and rub it onto furniture to remove dust and grime.
- Remove any excess furniture with a dry cloth.
DIY Non-Toxic Cleaning Recipes For The Kids Playroom
26. Toy Disinfectant

Little ones put everything in their mouth! So it’s important to keep their toys clean. But you don’t want to go overboard.
This toy disinfectant spray is a staple in our playroom. We go through it often but do keep vigilant in replacing this spray frequently to prevent the growth of bacteria or mold since this spray doesn’t have any chemical preservatives.
Ingredients:
- ¾ cup distilled white vinegar
- 20 drops of lemon essential oil
- 20 drops of tea tree essential oil
Instructions:
- Combine white vinegar and essential oils in a glass spray bottle.
- Shake well to combine.
To Use:
- Spray hard-surface toys with a generous amount of spray and let them sit for up to 30 minutes (longer is better).
- Rinse toys in warm water to remove spray and dry thoroughly.
- If your child has sensitivities to essential oils or citrus oils, you can also use the same method with 3% hydrogen peroxide or 70% isopropyl alcohol. Rinse with water to remove once toys are disinfected.
27. Playmat Cleaning Solution
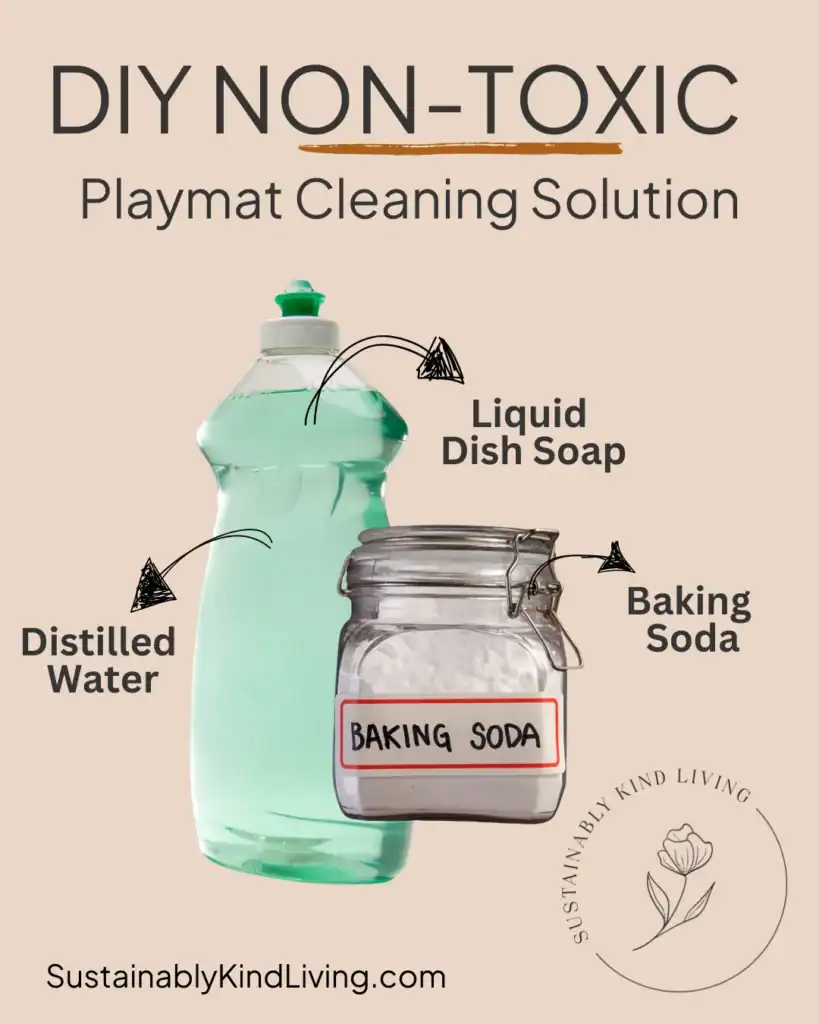
Typically, a good wipe-down with diluted vinegar will do for everyday maintenance, but when your child’s playmat needs a good deep clean, I like to use this paste to help lift any set-in stains and bring it back to looking like new.
Ingredients:
- ½ cup baking soda
- ½ cup distilled water
- ½ cup non-toxic liquid dish soap
Instructions:
- In a small bowl or glass jar, combine baking soda, distilled water, and liquid dish soap until it creates a liquidy paste.
To Use:
- Set a playmat outside, or somewhere you don’t mind getting wet when you rinse the playmat off.
- Apply the paste with your fingers using circular motions, focusing on areas with set-in stains.
- You can also use a soft sponge (but don’t use the abrasive side to avoid unnecessary wear).
- Let the paste sit for 10-15 minutes and then rinse with a bucket or hose.
- Let dry in a sunny, well-ventilated place until completely dry.
28. Gum/Adhesive Remover

I don’t know about your playroom, but oftentimes inexplicable sticky stuff appears in our playroom, whether it’s dried jelly, adhesive from toy packaging, or silly putty that has gotten stuck in a corner. Sometimes I just have no idea what it is. But when I run into a sticky situation, I bust out this non-toxic “goo gone.”
Ingredients:
- ¼ cup baking soda
- 3 tablespoons olive oil
- 6 drops of lemon essential oil
Instructions:
- In a small glass jar, combine baking soda, olive oil, and lemon essential oil until it’s the consistency of sunscreen.
To Use:
- Apply directly to the sticky substance and let sit for 10 minutes.
- Remove with a rag.
- In some cases, you may need to scrape the sticky substance with a putty or butter knife, then reapply and repeat the same process until it’s gone.
29. Permanent Marker Remover

Accidents happen – some accidents are small, and others are, well… more permanent.
This is a great trick for when your little one gets ahold of a permanent marker and decides to turn the playroom walls into their next masterpiece.
It’s so simple, it almost seems too good to be true! It’s not a miracle, but this trick works most of the time.
Ingredients:
- 91% isopropyl alcohol (you can get away with 70%, but it will require more elbow grease)
Instructions:
- Soak a cotton ball in isopropyl alcohol and then rub it against the affected surface.
- If working on a painted surface, be sure to test this method in an inconspicuous place to ensure it won’t remove or discolor the paint.
Tips:
- Isopropyl alcohol doesn’t always work. It sounds a little out there, but in extreme cases, spray sunscreen can also help to remove set-in permanent markers.
30. Cleaning Spray for High Chairs/Booster Seats
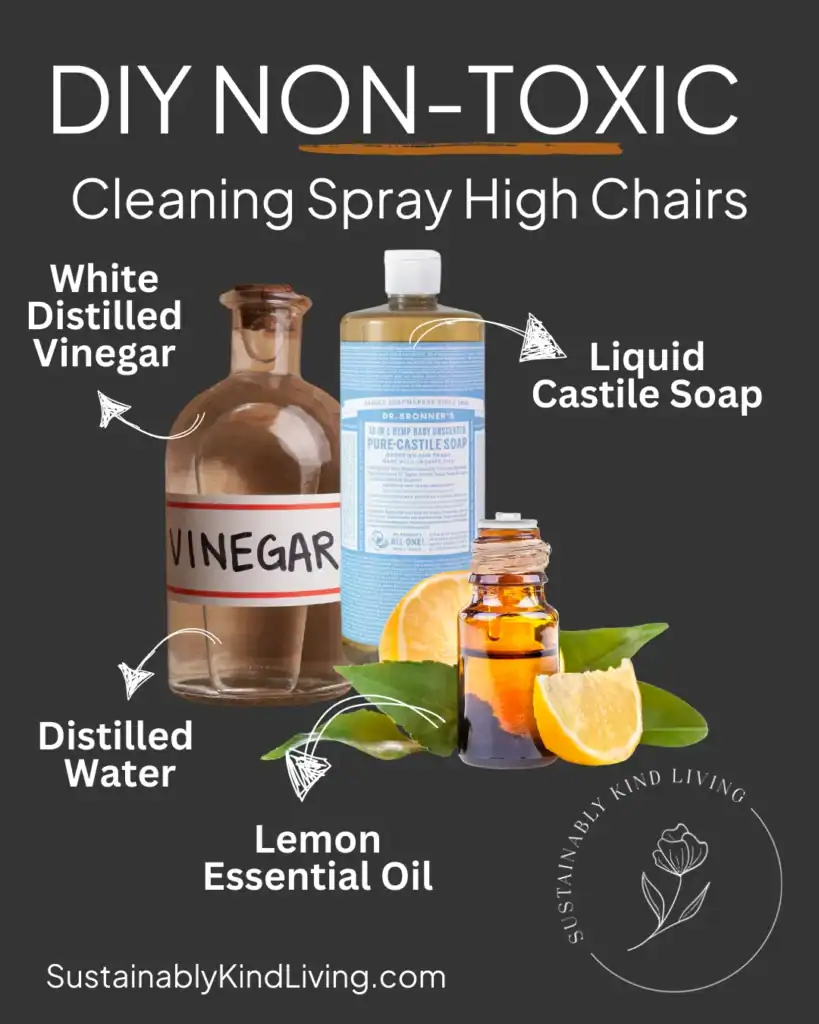
It’s never a good idea to use commercial disinfectant wipes around young children.
And they certainly should never be used on their high chairs or anywhere near a surface that they eat from, because they are going to ingest anything their food comes into contact with.
This cleaning spray for high chairs strikes that perfect balance of having just enough oomph to clean up sticky messes without being too strong to pose a risk to your baby’s health.
Ingredients:
- ½ cup distilled white vinegar
- 2 cups distilled water
- 1 tablespoon liquid castile soap
- 20 drops of lemon essential oil or 1 good squeeze of lemon juice (omit if your child has sensitivities to citrus)
Instructions:
- Combine all ingredients in a glass reusable spray bottle and shake until well combined.
To Use:
- Spray down your child’s high chair (hard surfaces only) liberally and wipe with a dry microfiber cloth.
- Note: This is not a disinfectant spray. It’s a good idea to naturally disinfect your child’s eating surfaces every couple of days using isopropyl alcohol or hydrogen peroxide. Remember to wipe clean with water after disinfecting.
What is a natural cleaner?
A natural cleaner is a cleaning product made from simple, non-toxic ingredients that you probably already have in your home, like vinegar, baking soda, and essential oils.
Since they are made with natural ingredients, they are free from harsh chemicals, synthetic fragrances, and other harmful substances that can pose serious health risks, especially to little ones and furry friends.
Why do companies keep using toxic ingredients in their cleaning products?
Perceived Effectiveness
No one will argue that harsh chemicals like chlorine bleach, ammonia, and quaternary ammonium compounds are highly effective at removing tough stains, cutting through grease, and killing bacteria.
Manufacturers capitalize on these qualities using aggressive marketing campaigns and have conditioned us to associate clean with the strong scents and powerful formulas of conventional cleaning products.
Many assume that if a product smells harsh or feels tingly on their skin, it must be working better than gentler, natural alternatives. I used to be one of them!
Cheap To Manufacture
Manufacturers choose to use these toxic chemicals like 2-butoxyethanol, nonylphenol ethoxylates, and phthalates since they are inexpensive to produce.
This allows manufacturers to maximize their profit margins. The unfortunate truth is that most major corporations prioritize their bottom line over our health.
Lack of Regulation
Ingredient disclosure requirements for cleaning products are virtually non-existent in the U.S., with only a few exceptions, such as a New York and California state law that mandates reporting. However, compliance with this law has been minimal, and companies have largely ignored it.
In fact, the cleaning product industry has actively lobbied against stricter regulations and transparency requirements, often arguing that proprietary formulations should remain confidential. This just adds to the lack of mandatory ingredient reporting.
How do you sanitize without chemicals?
- Vinegar: The acetic acid in vinegar disrupts bacterial cell membranes, causing them to break down and die.
- Lemon Juice: The low pH of lemon juice creates an inhospitable environment for many microorganisms, effectively inhibiting their growth and survival.
- Hydrogen Peroxide: Hydrogen peroxide works by producing free radicals that attack and destroy essential cellular components of microorganisms.
- Tea Tree Oil: Tea tree oil contains terpinen-4-ol, which disrupts the cell membranes of bacteria, leading to their destruction.
Other Effective Methods
- Hot Water: Use hot water to wash dishes, laundry, and other items. Heat denatures proteins and disrupts cellular structures, rendering microorganisms inactive.
- Steam Cleaning: Steam cleaning can effectively kill bacteria and sanitize surfaces. It’s particularly useful for cleaning carpets, upholstery, and hard-to-reach areas. The high-temperature steam breaks down the molecular structure of microorganisms, destroying their cell walls.
- Sunlight: Sunlight is a natural disinfectant. Expose items to sunlight to kill bacteria and germs. UV rays in sunlight damage the DNA and RNA of bacteria, preventing them from replicating.
This has been your guide to the best non-toxic cleaning recipes to make at home.
As you can see, making your own natural cleaning products is a simple, empowering way to transform your home.
By opting for these DIY recipes, you’re not just saving money and reducing waste – you’re taking a stand for your health, your loved ones, and the planet.
I hope you give these recipes a try! And please share any non-toxic cleaning recipes that you love. We want to grow this list so that we can share this important information with everyone!
With these small, conscious choices, you’re creating a ripple effect of positive change that extends far beyond your own home.
Explore more of our incredible Non-Toxic Living articles:
- Non-Toxic Floor Cleaners | Title, Hardwood & Granite
- Non-Toxic, Natural & Organic Laundry Detergents
- DIY Zero-Waste Swaps | Kitchen & Bathroom
- Steps To Reduce Toxins In Your Home
- Natural & Non-Toxic Stain Removers
- Homemade Oven Cleaner Recipes
- Non-Toxic Laundry Odor Removers
- Natural Baby Laundry Detergents
- Eco-Friendly Laundry Detergents
- Eco-Friendly Cleaning Products
- Non-Toxic & Natural Dish Soap
- Non-Toxic Dishwasher Tablets
- Most Toxic Household Items
- Non-Toxic Air Fresheners
- Non-Toxic Oven Cleaners
- Laundry Detergent Sheets
- Non-Toxic Toilet Cleaner
- Non-Toxic Dryer Sheets
Like It? Pin It!

References:
- American Cancer Society. (n.d.). Formaldehyde. https://www.cancer.org/cancer/risk-prevention/chemicals/formaldehyde.html
- U.S. Food and Drug Administration. (n.d.). 1,4-Dioxane in Cosmetics: A Manufacturing Byproduct. https://www.fda.gov/cosmetics/potential-contaminants-cosmetics/14-dioxane-cosmetics-manufacturing-byproduct
- U.S. Environmental Protection Agency. (2016). Hydrochloric Acid. https://www.epa.gov/sites/default/files/2016-09/documents/hydrochloric-acid.pdf
- Jiang, C., et al. (2022). Exposure to household cleaning products and the risk of asthma: A systematic review and meta-analysis. https://pmc.ncbi.nlm.nih.gov/articles/PMC8720300/
- National Center for Biotechnology Information. (2022). Triclosan. https://www.ncbi.nlm.nih.gov/books/NBK546677/
- Beyond Pesticides. (n.d.). Triclosan: FDA 2016 Decision and History. https://www.beyondpesticides.org/resources/antibacterials/triclosan/fda-2016-decision-and-history
- National Institutes of Health. (2022). Preterm birth is more likely with exposure to phthalates. https://www.nih.gov/news-events/news-releases/preterm-birth-more-likely-exposure-phthalates
- New York State Department of Environmental Conservation. (n.d.). Household Cleansing Product Information Disclosure Program. https://dec.ny.gov/environmental-protection/help-for-businesses/household-cleansing-product-information-disclosure-program
- California Legislative Information. (2017). SB-258 Cleaning Product Right to Know Act of 2017. https://leginfo.legislature.ca.gov/faces/billNavClient.xhtml?bill_id=201720180SB258
- OpenSecrets. (2023). Facing new attempts to regulate toxic substances, the chemical industry’s lobbying expenses skyrocketed in 2022. https://www.opensecrets.org/news/2023/04/facing-new-attempts-to-regulate-toxic-substances-the-chemical-industrys-lobbying-expenses-skyrocketed-in-2022/

Steal My Non-Toxic Cleaning Checklist!
Believe us, it’s the BEST…. and it’s free. Does it really get any better than that?! Sign up for our newsletter and get this free checklist to clean your home without any harmful chemicals!